An Introduction to White Balance
Have you ever taken a photo and wondered why it looks unnaturally blue or overly yellow? That off-color look happens because the camera misreads the scene’s colors—specifically, the color white. An essential camera setting to get right is called ‘white balance’ or WB for short. White balance ensures that what looks white to your eyes also looks white in your photos. It’s like telling your camera how “warm” or “cool” the lighting is so your pictures represent truer colors. If the camera gets it wrong, your image might have a blue or yellow color cast, which may be difficult to correct in editing.
Although your eyes adjust seamlessly to different lighting conditions—like the warm hue of a dim room or the cool shade of a cloudy day—cameras need some guidance. Every light source emits its unique shade or “color temperature.” Unless you’ve had to consider it, you are likely unaware of these different “temps” because your eyes do such a wonderful job of making everything look normalized.
Every light source emits its unique shade or "color temperature" that your eyes normalize.
White Balance Options
Cameras provide several white balance options to handle these varying light conditions, but they’re not perfect or practical for every situation. The good news is that you don’t have to know color theory to work successfully with white balance.
1. Auto: As you might have guessed, the camera automatically gauges the environment and tries to set the balance for you. This setting does a great job of rendering colors accurately and can be left on most of the time until you notice odd color shifts in your photos. Then, you may opt for one of the available white balance presets to capture more realistic colors.
2. Presets: Cameras have several white balance options designed to compensate for various light sources. These options are a collection of presets for specific conditions: Daylight, Cloudy, Shade, Indoors, etc. As you look through your camera’s white balance options, notice there is no “partly cloudy” or “mostly sunny” setting. Presets work best when the light conditions are at a particular temperature or Kelvin. For example, the ideal Kelvin for “daylight” is 5500K, not 5000K or 6000K.
3. Custom: For those who want total control. You can use a white or gray card as a reference to set the balance manually. This option is highly accurate and best when you have more time to work with a subject or scene, not during a soccer game or family gathering.
Typical White Balance Preset Options: Auto, Daylight, Cloudy, Shade, Incandescent, Fluorescent. White balance presets are just that—presets. They work best when the actual color temperature of a light source is closer to the ideal Kelvin rating (see below.)

Above is a simplified Kelvin Scale showing associated light sources.
Some advanced cameras let you dial in the exact color temperature using Kelvin values. This is for those who really want to fine-tune—or obsess over—their shots during the capture process.
Why File Types Matter
Modern digital cameras have two photo file types or formats to capture images: JPEG and RAW. They are two different animals, and the format you choose can significantly impact how you can work with a photograph in post-editing.
JPEG files are much smaller in size than their RAW counterpart because the camera discards, i.e., deletes the information not used during the capture process. This is information you may need to fix the image, so getting the white balance right during the shot is critical. But you have much more flexibility with a RAW file because nothing is deleted, and the information necessary to correct an image is still available during the editing phase.
Learn more about JPEG and RAW Photo File Formats
Shooting in RAW has many advantages over JPEG, with complete control over the white balance as a major one. White balance is vitally essential to consider for accurate colors, but not necessarily at the moment when the picture is made. The phrase “work smart, not hard” applies here. Far too many variables, such as partly cloudy or mostly sunny, can cause a misreading.
If you’re shooting in RAW, you can leave the white balance on auto and make corrections in Adobe Lightroom or a similar app. Even if the preview image looks funky during playback, you can still easily rescue the colors. Addressing white balance afterward frees up thinking in the field and allows you to make more refined adjustments than you would otherwise get using a preset option.

Presets Aren't Perfect
Presets work best when the light conditions are at a particular temperature or Kelvin, but they can miss the mark when the conditions are not ideal. The white balance settings in the above animation are the same as those available in the camera when captured in the RAW format—your WB options may vary, depending on your camera.
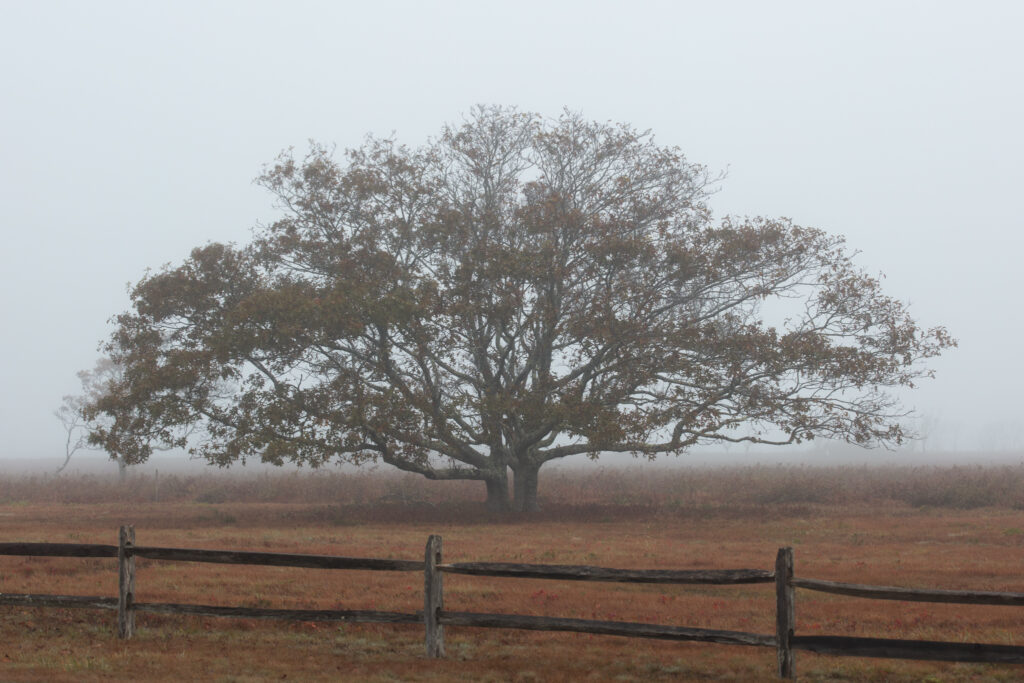
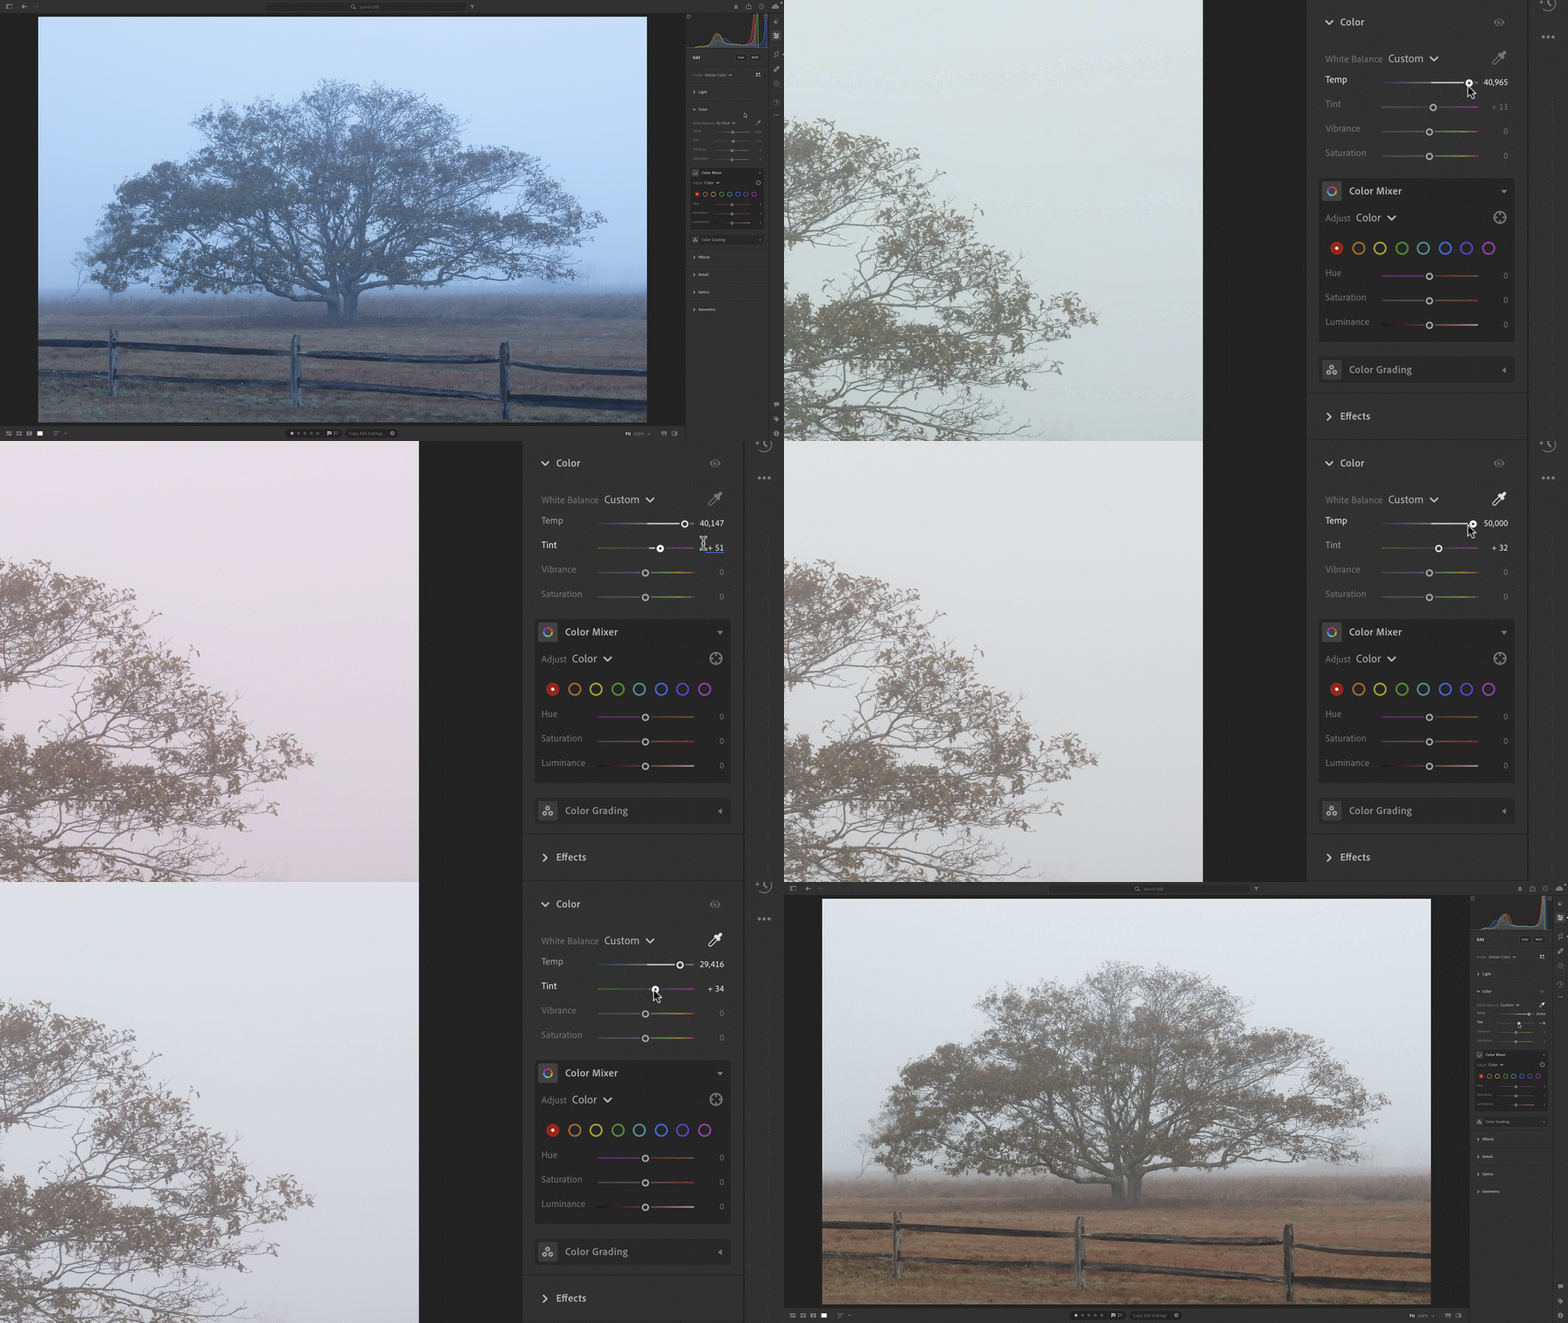
The foggy Nantucket landscape confused the camera’s automatic white balance (AWB) reading, resulting in an extremely bluish color cast. That look may fly in Smurfland, but not here. Each WB option gives a representation of how the picture would appear if used during the capture. But as you can see, none of them would have rendered accurate colors as experienced by the eye.
If you’re shooting in RAW, leave the white balance on auto (AWB) and make corrections in post.

Correcting White Balance
The Temperature and Tint sliders in Adobe Lightroom and most other photo editing apps are used to adjust the relative color balance of an image. The settings are subjective, and there is no right or wrong adjustment. Slide them left or right until the photo looks good to you. If you aren’t confident about where to begin, use the eyedropper (White Balance Selector) to sample a “white” picture area until the colors look accurate. Sample elements you know should be white or close to it, like the fog in the above sample image. Close counts with the initial selection, as you can then use the Temp and Tint sliders to fine-tune the image.
Lightroom and Photoshop Tutorials
Adobe has done an excellent job of educating its users on how to use Lightroom and Photoshop. Many free tutorials on their website, including some on correcting white balance, will get you up to speed quickly. Amateurs and professionals also provide bite-size videos under each application’s “Learn” section. Desktop and mobile locations vary, so look around. Users of other photo editing applications can learn a lot from these resources, too.
If you’re new, photo editing can feel overwhelming, but don’t let that deter you. Keep at it. White balance isn’t the alchemy of colors it may first seem. Sure, there’s a learning curve. But that’s what makes any endeavor worthwhile. From a photographer’s viewpoint, the better the initial photograph, the less time spent behind a display editing or correcting images. Although you may read contrary advice, white balance doesn’t fall under that category.
Ready to Learn?
SIGN UP FOR A CLASS TODAY
Shutterbug Training is located in Columbus, Ohio, and offers in-person classes and private photography instruction to individuals and groups. Virtual training is available upon request.